Note
The Composite scenario is HTTP-only and does not support combining non-HTTP protocol mappings.
Traffic Parrot provides two powerful features for managing test environments:
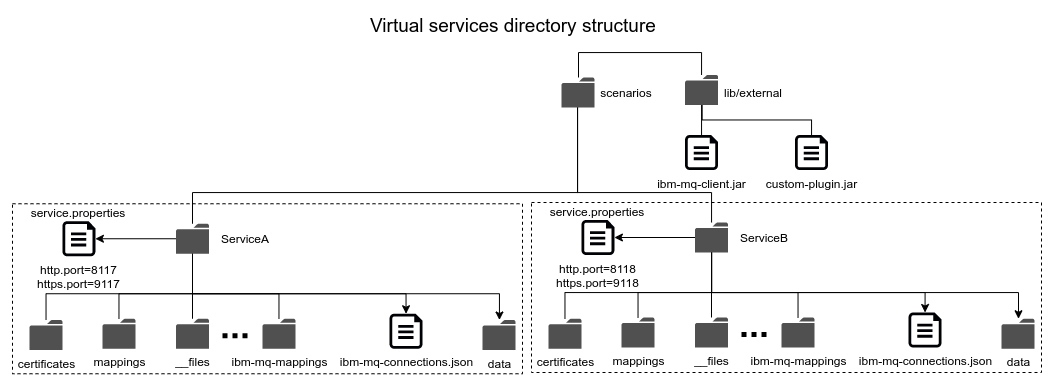
Virtual services help organize your test data by project, team, or environment, while composite scenarios provide flexibility in combining these isolated test sets when needed.
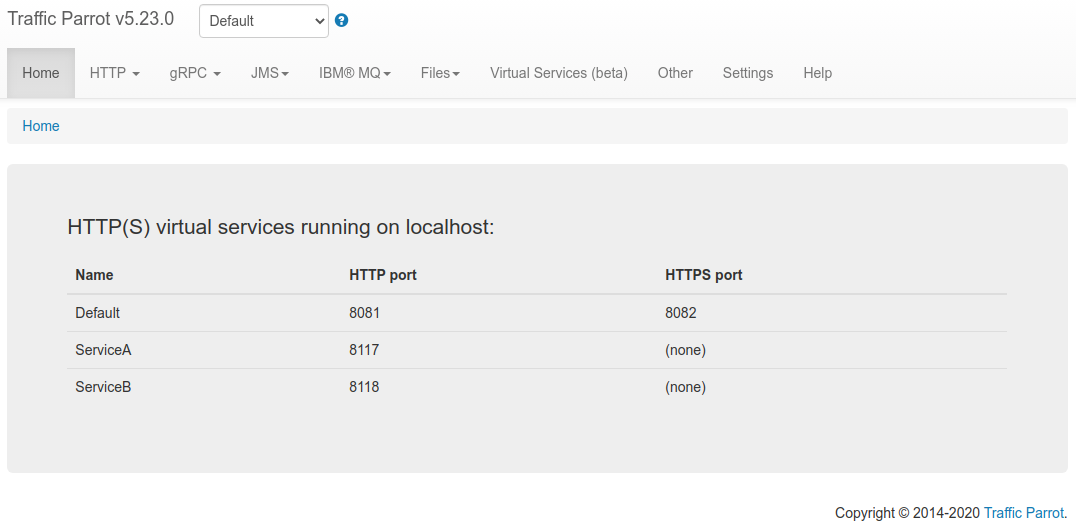
The virtual services can be managed using the Virtual Services UI page:
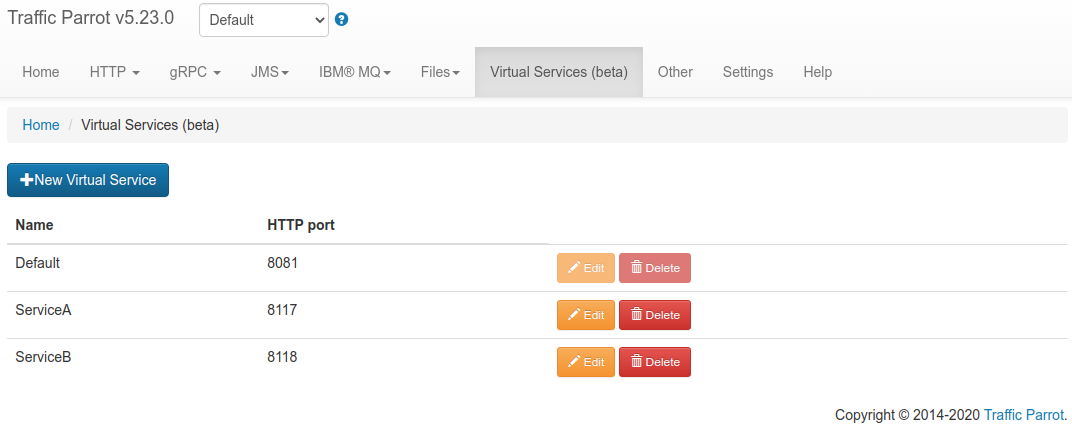

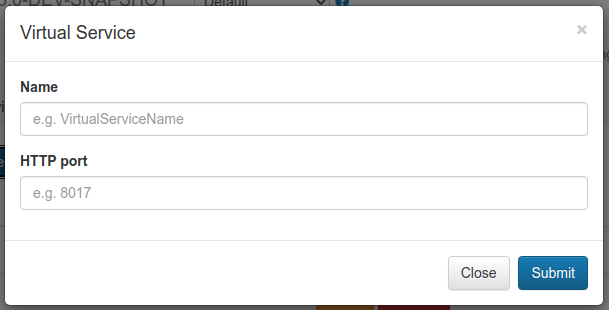
Click the submit button to create the virtual service. If a valid free HTTP/HTTPS port is specified, then the virtual service will be accessible on the ports specified.

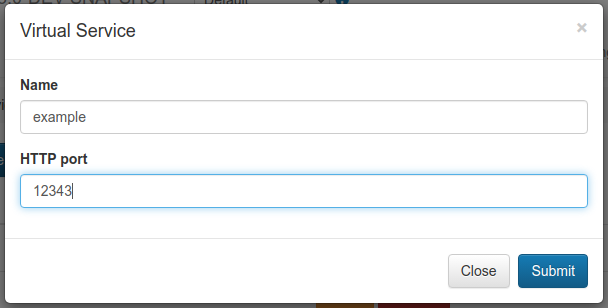
Click the submit button to edit the virtual service. If a valid free HTTP/HTTPS port is specified, then the virtual service will be accessible on those ports. The service will no longer be accessible on the old ports.

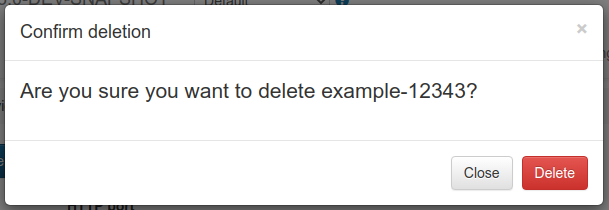
Click the delete button to delete the virtual service. The service will no longer be accessible on the old port. The deleted virtual service mappings will be backed up in the deleted-scenarios directory.
Once selected, the following will happen:
| Property name | Description | Example usage |
|---|---|---|
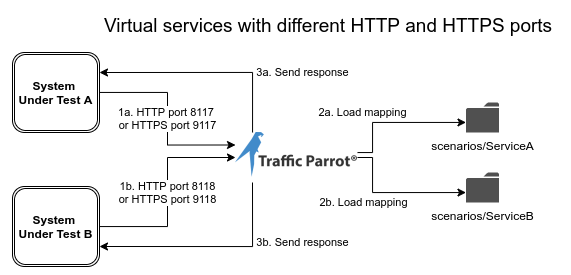
| http.port | The HTTP port for the virtual service | http.port=9017 |
| https.port | The HTTPS port for the virtual service | https.port=9018 |
| https.key.store.path | Path to the HTTPS key store to use, relative to the virtual service directory | https.key.store.path=certs/server.jks |
| https.key.store.password | The password for the HTTPS key store | https.key.store.password=password |
| https.key.manager.password | The password for the HTTPS key store manager | https.key.manager.password=password |
| https.key.store.type | The type of key store used, for example JKS or PKCS12 | https.key.store.type=JKS |
| https.need.client.auth | Whether client authentication is required. Set to true or false. | https.need.client.auth=true |
| https.trust.store.path | Path to the HTTPS trust store to use, relative to the virtual service directory | https.trust.store.path=certs/servertrust.jks |
| https.trust.store.password | The password for the HTTPS trust store | https.trust.store.password=password |
| https.trust.store.type | The type of trust store used, for example JKS or PKCS12 | https.trust.store.type=JKS |
| ibm.mq.queue.replay.on.startup | When set to true, replay mode will be enabled for this virtual service ibm-mq-mappings on startup | ibm.mq.queue.replay.on.startup=true |
| ibm.mq.queue.replay.request.queue.manager | The name of the queue manager to connect to consume request messages, as specified in ibm-mq-connections.json | ibm.mq.queue.replay.request.queue.manager=REQ.QM |
| ibm.mq.queue.replay.response.queue.manager | The name of the queue manager to connect to produce response messages, as specified in ibm-mq-connections.json | ibm.mq.queue.replay.response.queue.manager=RSP.QM |
| jms.queue.replay.on.startup | When set to true, replay mode will be enabled for this virtual service jms-mappings on startup | jms.queue.replay.on.startup=true |
| jms.queue.replay.request.connection.id | The id of the connection to use to consume request messages, as specified in jms-connections.json | jms.queue.replay.request.connection.id=1 |
| jms.queue.replay.response.connection.id | The id of the connection to use to produce response messages, as specified in jms-connections.json | jms.queue.replay.response.connection.id=2 |
To configure a HTTP virtual service you should:
To configure a HTTPS virtual service you should:
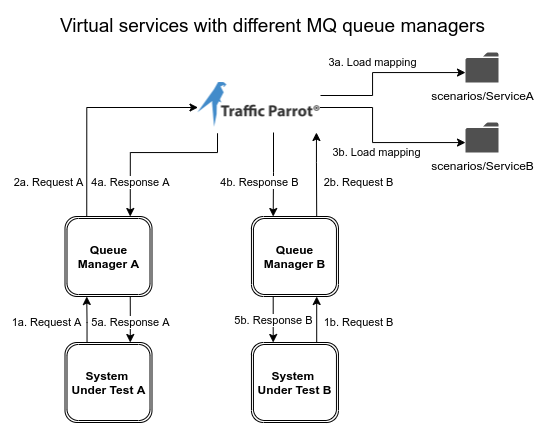
To configure a Native IBM® MQ virtual service you should:
To configure a JMS virtual service you should:
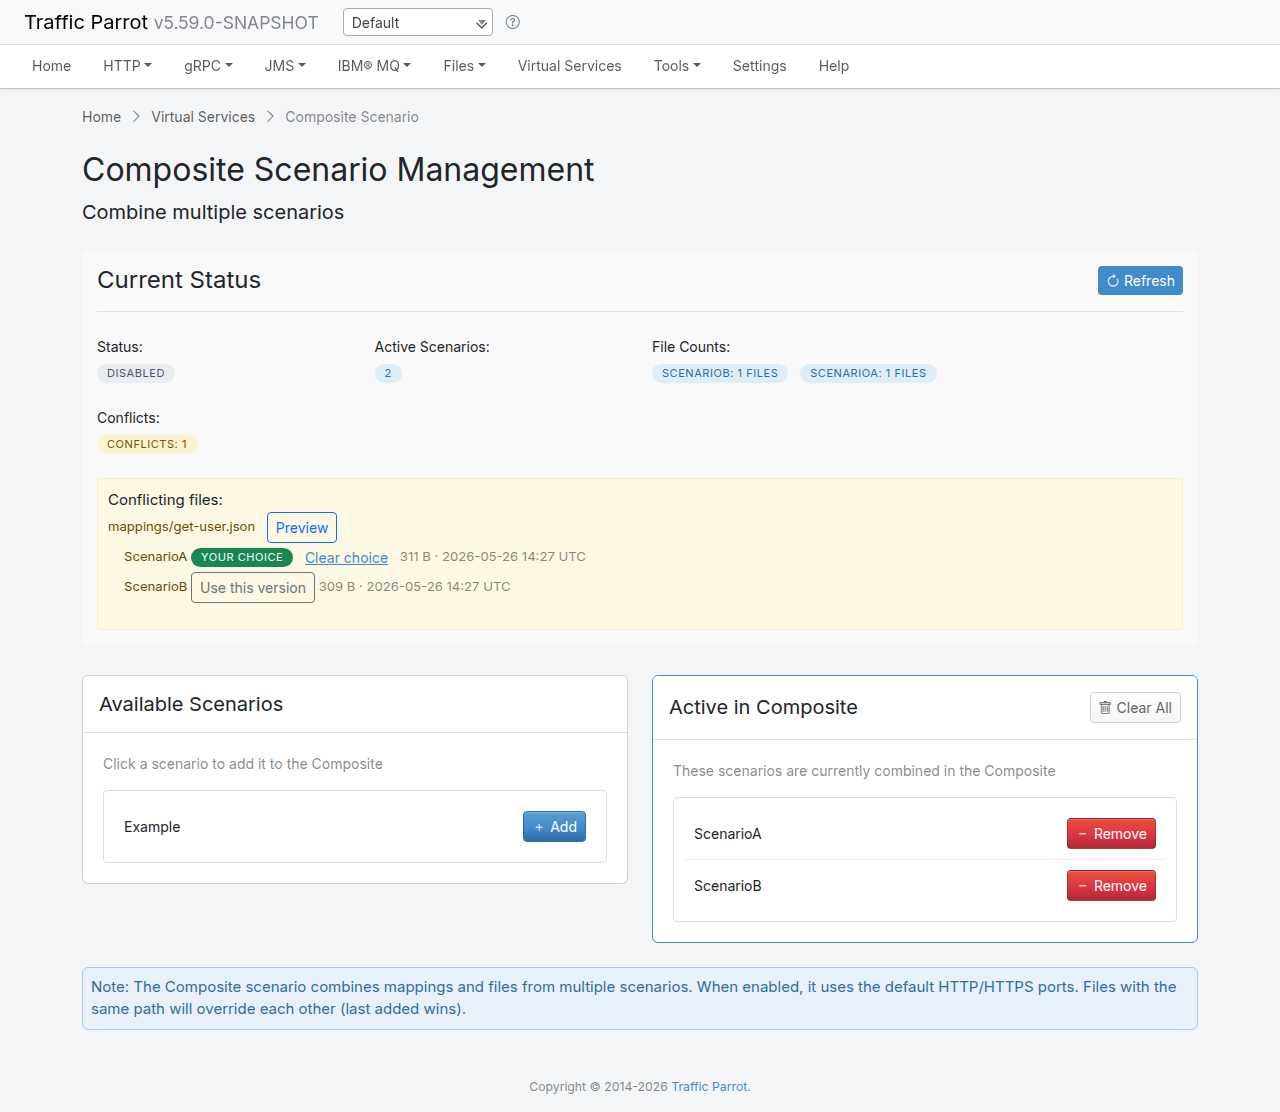
The Composite scenario feature allows you to combine mappings from multiple scenarios into a single active scenario. This is useful for testing complex environments where different teams maintain separate scenario sets that need to work together.
To access the Composite scenario management interface:
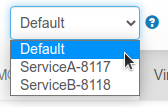
The Composite scenario also appears in the scenario dropdown selector with a link emoji (🔗) indicator. Selecting it from the dropdown activates the Composite scenario rather than opening the management interface.
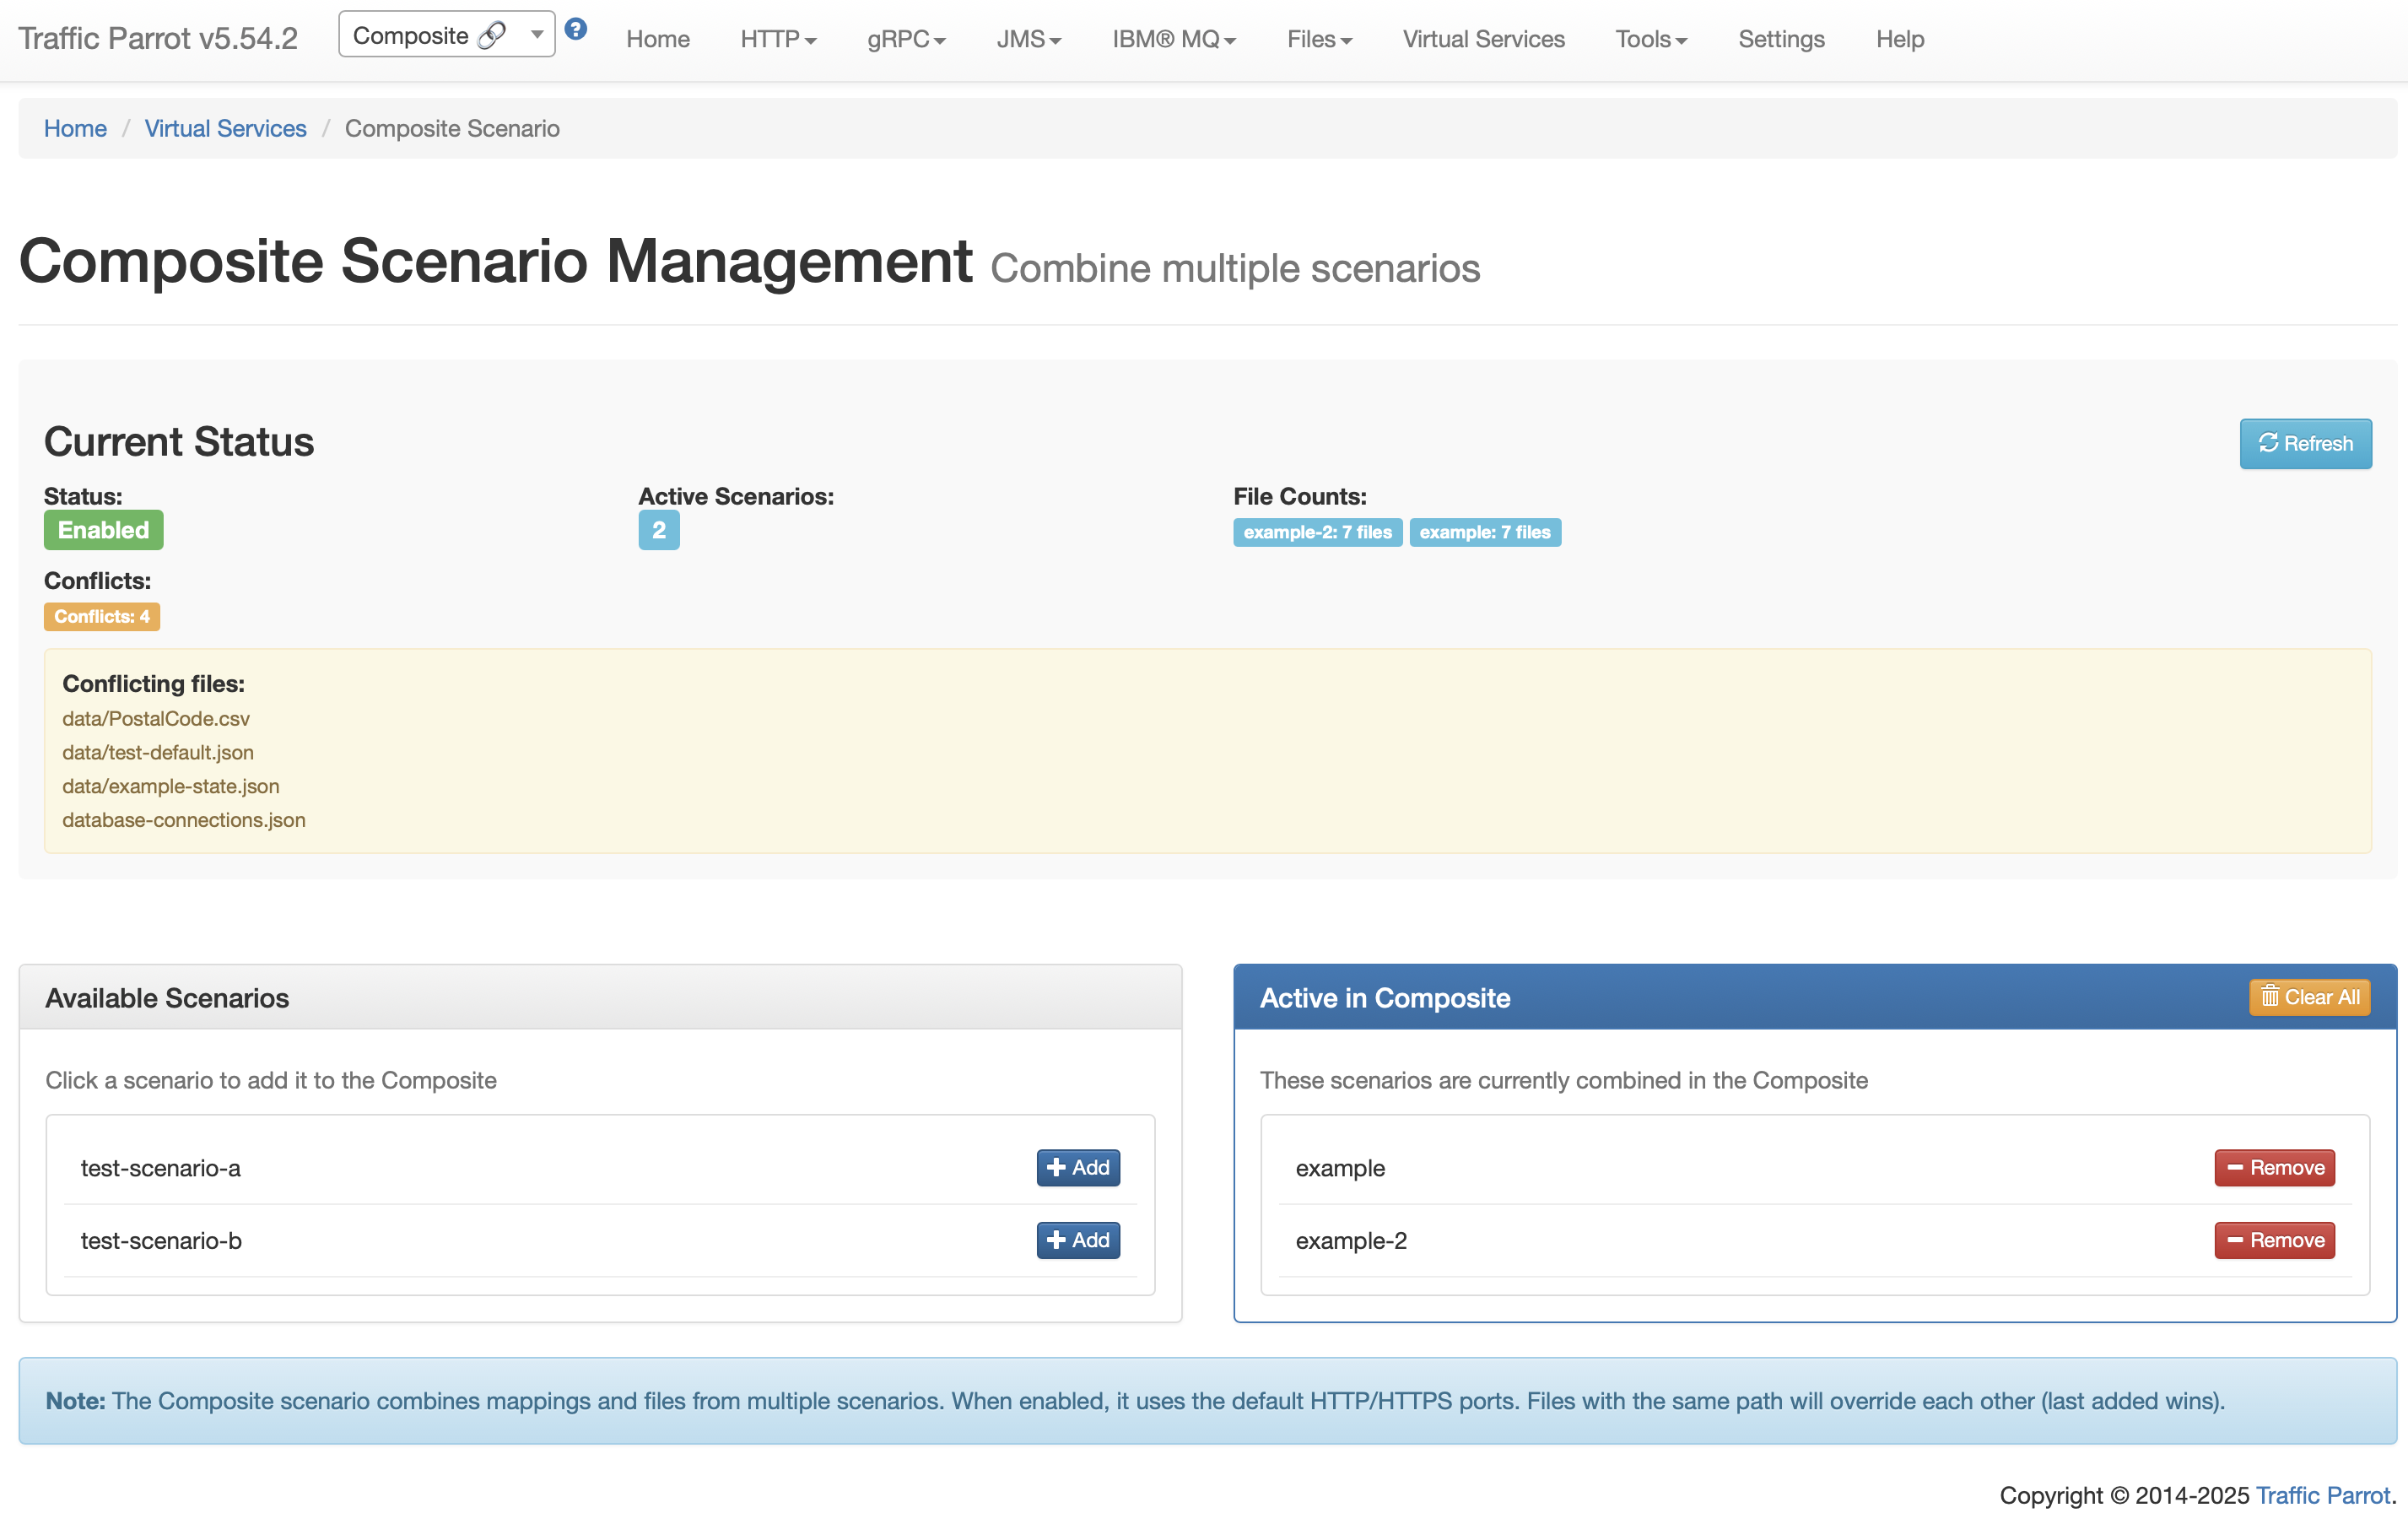
To add a scenario to the composite:
To remove a scenario from the composite:
Click "Clear All" to remove all scenarios from the composite at once.
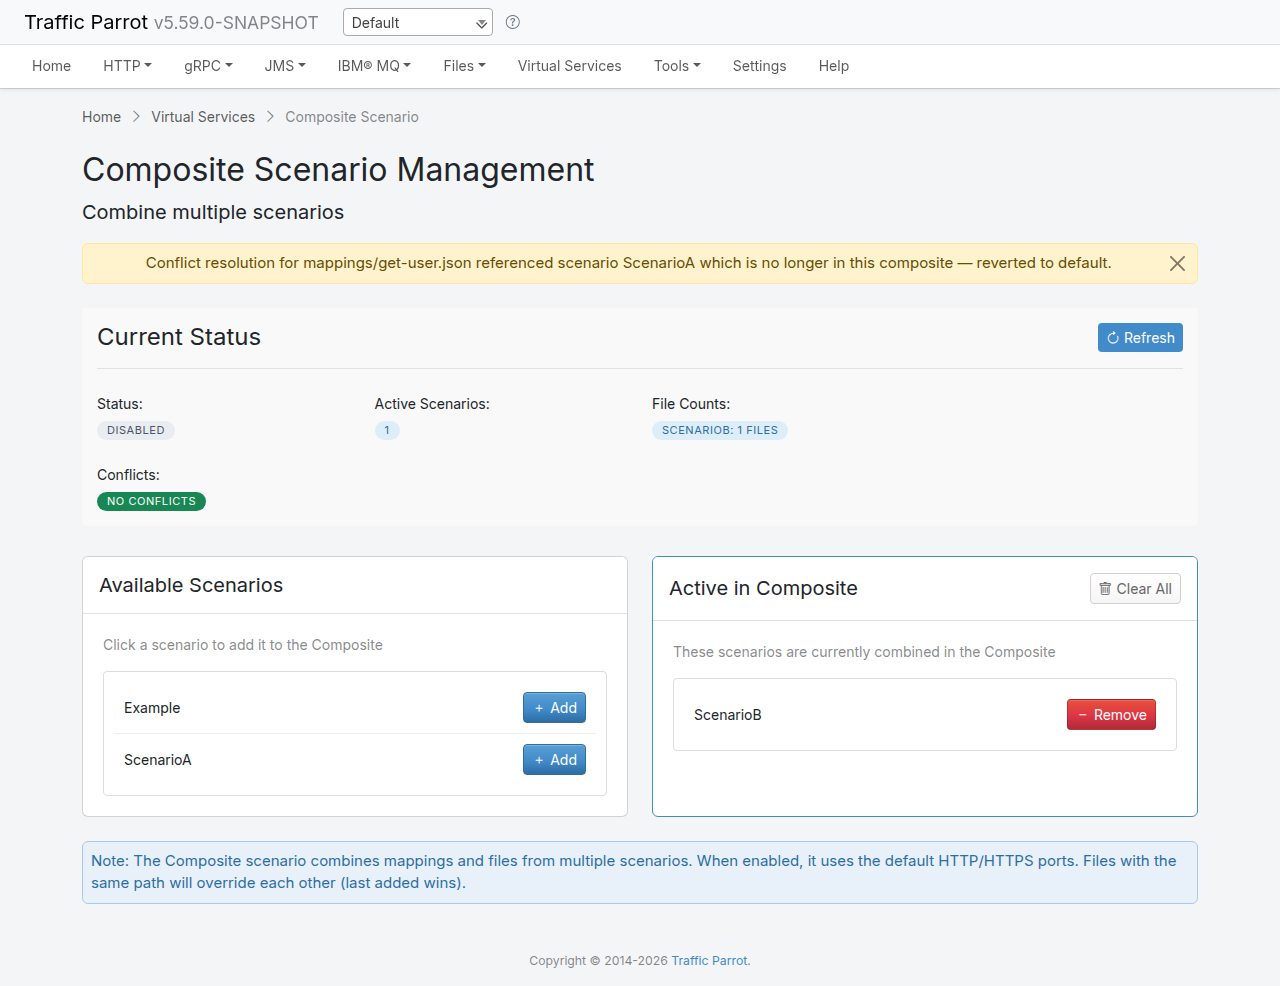
When the Composite scenario is active:
The Composite scenario is HTTP-only and does not support combining non-HTTP protocol mappings.
When two scenarios contribute a file with the same relative path (for example mappings/get-user.json in both scenarios), the Composite page lists the conflict together with each contributing scenario, the file size, and the last-modified timestamp. This lets you see at a glance which scenarios disagree on which files.
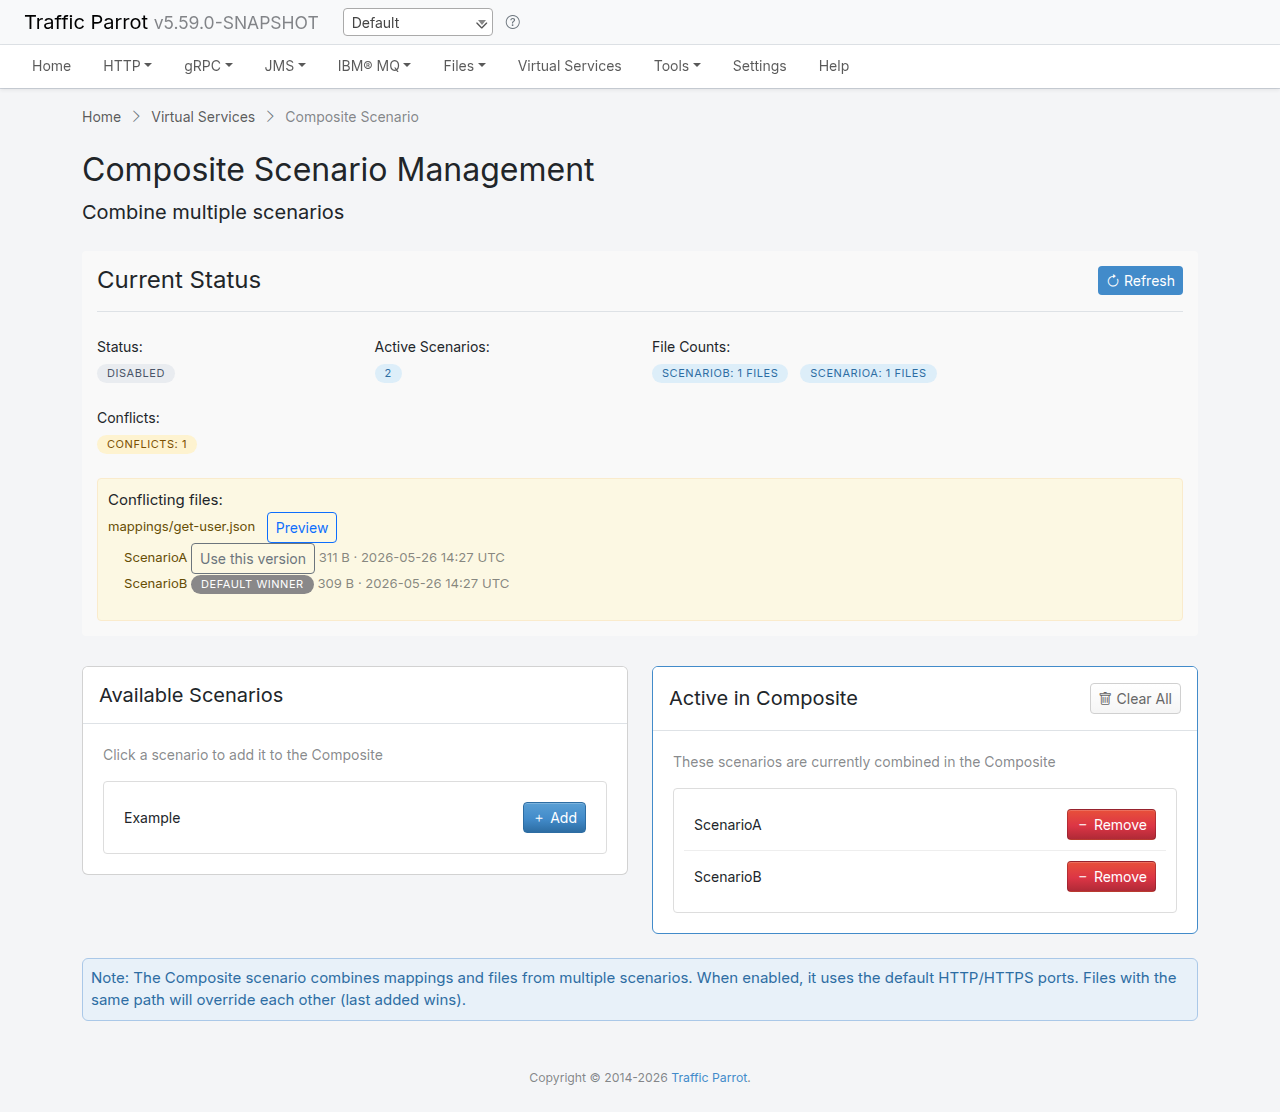
Click Preview next to a conflict to inspect each contributor's version of the file. Text files (JSON mappings, response bodies, and similar) render inline so you can compare them side by side. Binary files render as a stub that shows the size and a SHA-256 hash for each version, so you can tell whether the two versions differ without trying to render arbitrary bytes. Files larger than 1 MB are not rendered — the preview shows the size and prompts you to inspect the source scenario directly.
Each contributor in a conflict row carries one of three indicators:
<scenarioId> —
no explicit choice has been made; this contributor wins because it was the
last scenario added to the composite (process-order). This matches the
historical behaviour of composite scenarios.
<scenarioId> —
you have explicitly picked this contributor as the winner. The choice is
persisted in the composite metadata and survives reloads, restarts, and
adding or removing unrelated scenarios.
To revert an explicit choice, click Clear choice next to the currently chosen contributor. The composite falls back to the Default winner (process-order) for that file.
If a scenario that owns an explicit conflict choice is later removed from the composite, the choice can no longer be honoured. The next time the Composite page loads, the orphaned resolution is dropped automatically and a one-time warning banner is shown for each affected file, indicating which path and which scenario reference were dropped. The file then reverts to the default winner.
Conflict choices are keyed by the file's path relative to the composite root, so resolving a conflict at mappings/get-user.json does not affect a separate conflict at mappings/v2/get-user.json. Each path is resolved independently.
The following REST API endpoints are available for managing composite scenarios:
| Method | Endpoint | Description |
|---|---|---|
GET |
/api/scenarios/http/composite |
Get composite scenario status and active scenarios |
POST |
/api/scenarios/http/composite/add?scenario={name} |
Add a scenario to the composite |
POST |
/api/scenarios/http/composite/remove?scenario={name} |
Remove a scenario from the composite |
POST |
/api/scenarios/http/composite/clear |
Clear all scenarios from the composite |